How To Create A React App


There are a number of ways a react app can be created but regardless of the means, there are constants that must be present in every one of them. Tools like node and npm need to be installed before this can happen but the basic foundation will need:
Index.js, App.css, App.js files
React and react-dom dependencies
A bundler to group all the files to make it deployable
JSX implemented via a toolchain
You need to be aware of the basic tools that are needed so it is good we have gotten this out of the way. The process is really stressless, so consider yourself in luck as I will walk you through how to get this. A simple command executed will install and create all the necessary tools and apps needed for your react app to function.
React also:
Enables Hot Module Replacement (HMR) which means that a live reload for your webpage is enabled automatically for real-time change.
Makes it easy to deploy your website to the internet.
Helps to make testing, data tracking and debugging very easy.
Make sure that the render of the web apps performs faster than other frameworks thereby reducing the load-time.
Makes it easy to bolt-on technologies needed like TypeScript.
This is something you will definitely need in your arsenal of developer tutorials.
In this article, I will show you:
How to create your web-app with react.
What HMR is all about and how to enable it.
How to deploy your website on a platform called Netlify.
React
Well, React is a Javascript library for building user Interfaces. React helps developers write their code comfortably as the framework utilises the new syntax of Javascript Extensible Markup Language (JSX) instead of the conventional HTML. The framework brings this JSX, CSS and Vanilla Javascript together.
React also uses components to separate different sections in a website which makes it easier to understand and for better organisation. Dependencies (which is just a package that your project uses) makes it possible and easier to develop testable code because it enables users to write unit tests easily.
Getting Started With React
Alright, now you know about React and how it is really efficient. I encourage you to follow along as we install React and set up a React project with Create React App (CRA).
To follow along, you will need to have npm installed. It would be good if you were already familiar with node commands from the command-line but it is not a requirement.
What is NPM?
NPM is called Node Package Manager and this stems from when npm was first created as a package manager for Node. js. All npm packages are defined in files called package. json, the content of the package.
NodeJs is a cross-platform environment that runs and executes Javascript codes outside the browser. It is a version of Chrome’s V8 Javascript runtime engine and it allows you to develop server-side Javascript applications. It comes up with everything that is required to run a program written in JavaScript.
How to Install NPM
- Download the Installer. You will download this from NodeJs Official Website (Here).
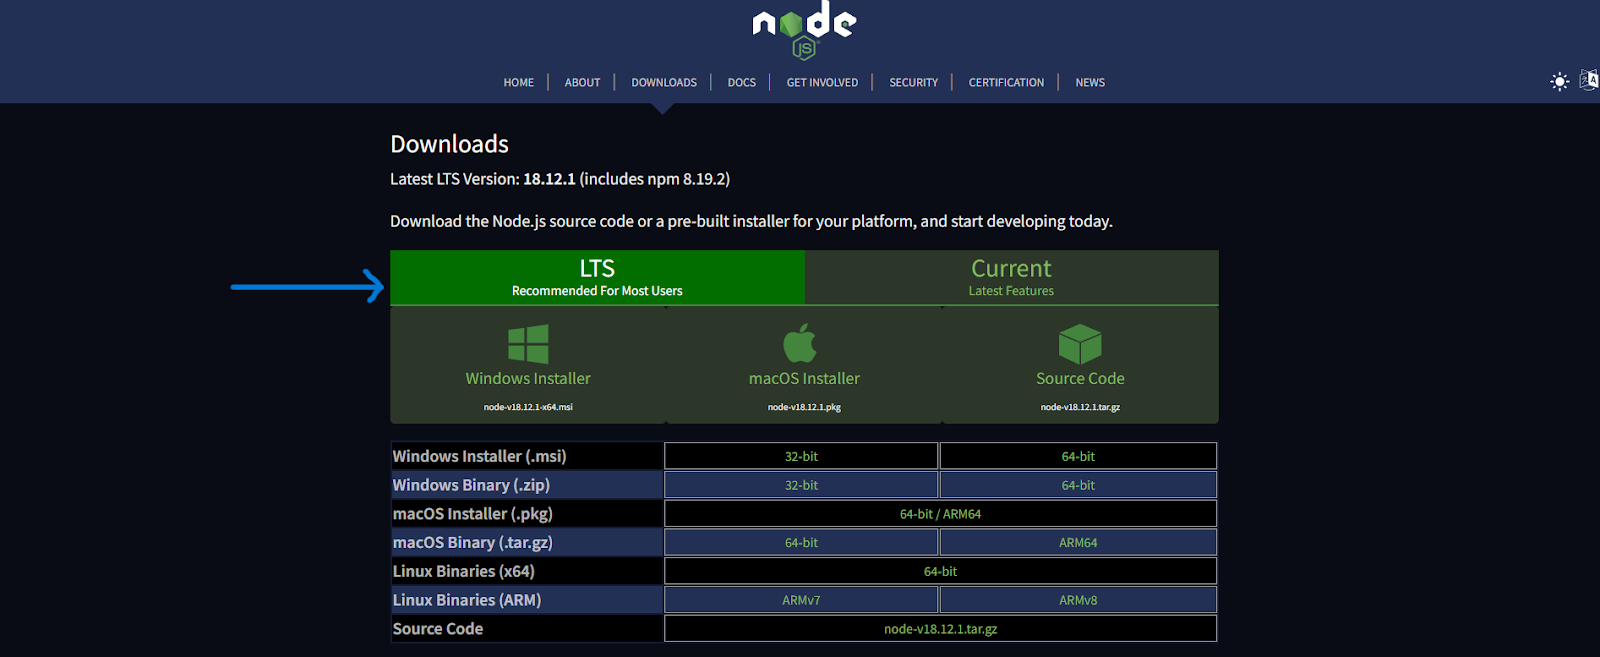
LTS means Long-term Support and it is a version that is highly recommended for you. Install it with a double click after the download.
- Installing Node.js and NPM by clicking on ‘Next’ here.
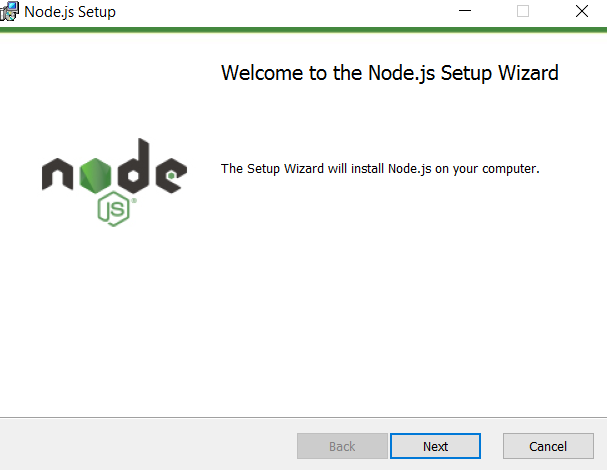
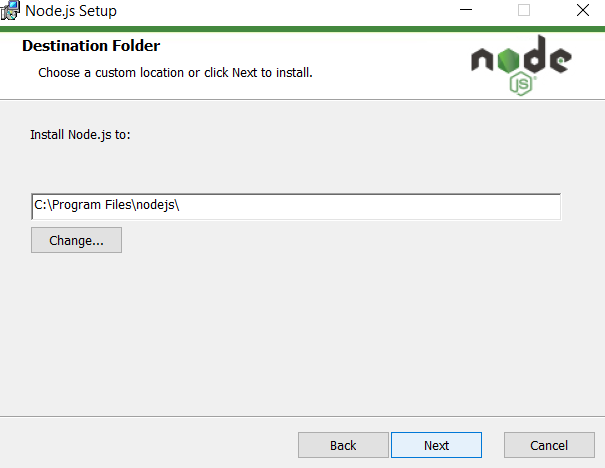
After you choose the path, double click to install the .msi binary files to initiate the installation process. Click on the “Next” when you see the dialog box that is prompted to you.
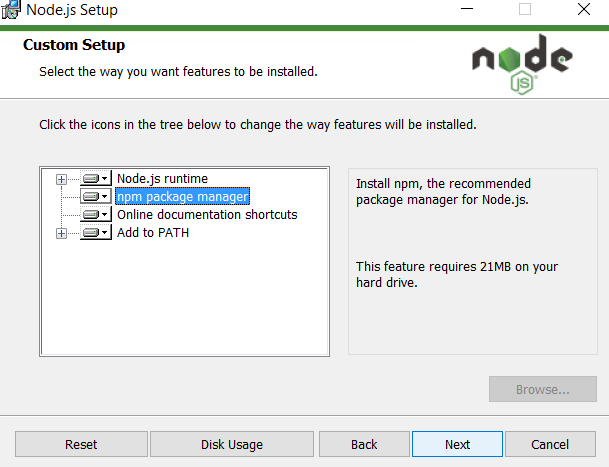
By clicking on the next button, you will get a custom page setup on the screen. Ensure that you choose the npm package manager and not the default Node.js runtime. This way, you can install Node and NPM simultaneously. You should have 143MB of space to install Node.js and npm features.
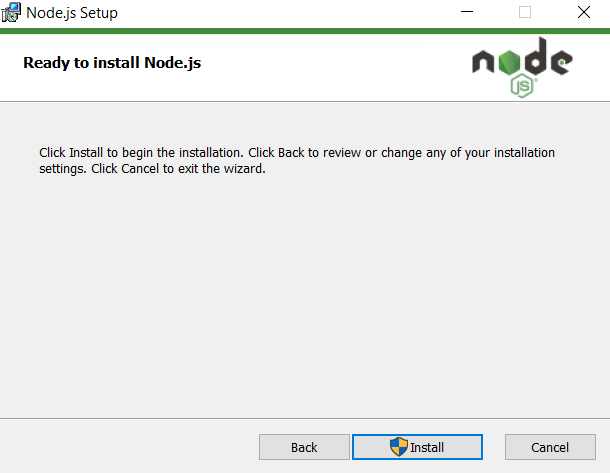
The setup is ready and all you need to do is click on install.
How to Run React
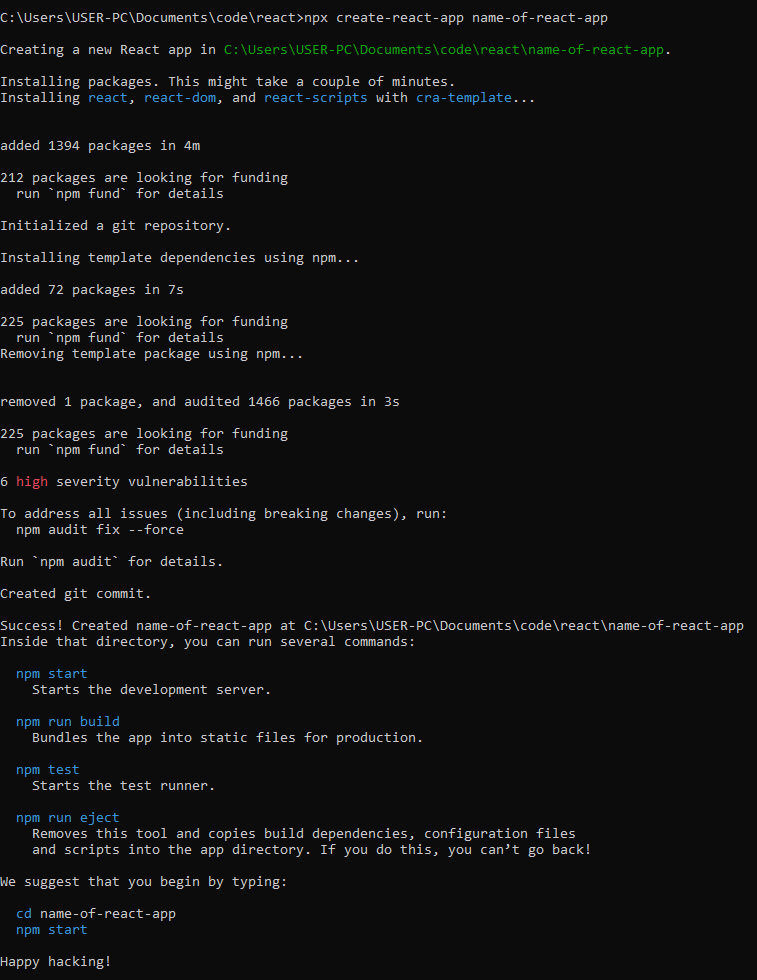
The official way to run react is to use the ‘npx create’ command. So we are going to use that, ergo you need to open up your terminal and paste the following command
npx create-react-app name-of-react-app
Here, ‘npx’ is the command for creating your react app and it stands for ‘Node Package Execute’. It comes with the npm and node that you have previously installed. It is an npm package that can execute any package you want from the npm registry without prior installation of said package.
I chose to call the name of my project ‘name-of-react-app’ to signify that you that space is meant for any name you desire. The name of a react app must not have spaces between words but rather hyphens.
React will automatically generate all your dependencies, install them and enable HMR (Hot Module Replacement). That term will be explained further in this article so never fret.
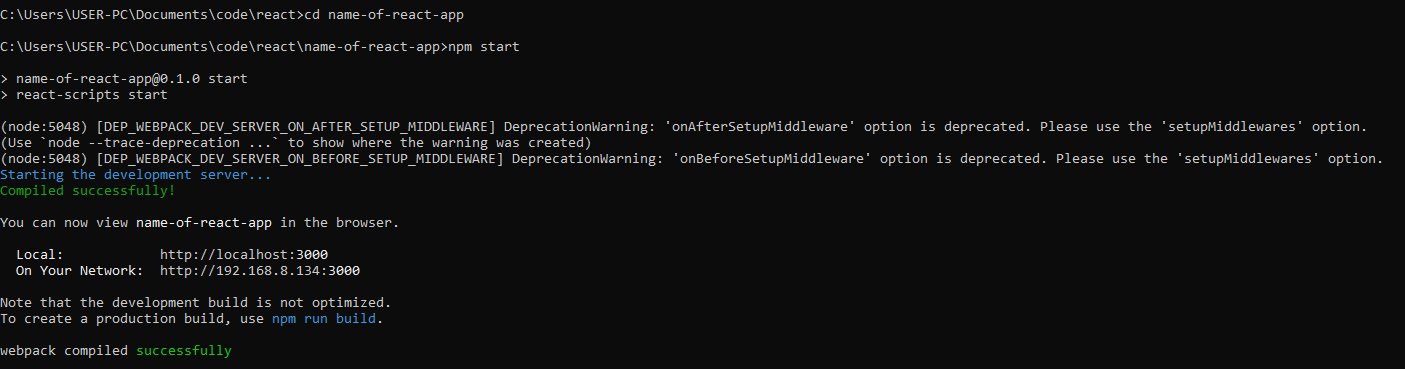
Once the command has finished running, cd into your folder and run the following commands as shown below.
Here you can see a list of commands that you can run with your react app in your terminal. To enable HMR and run your react app you will run this single command after entering the directory that is your project name. You can see it below;
The process of installing the dependencies and creating the app with the command;
npx create-react-app might take a minute or more to run depending on your internet connection.
The app will load automatically on your browser after the successful webpack compilation and build. You can access it manually by opening local host
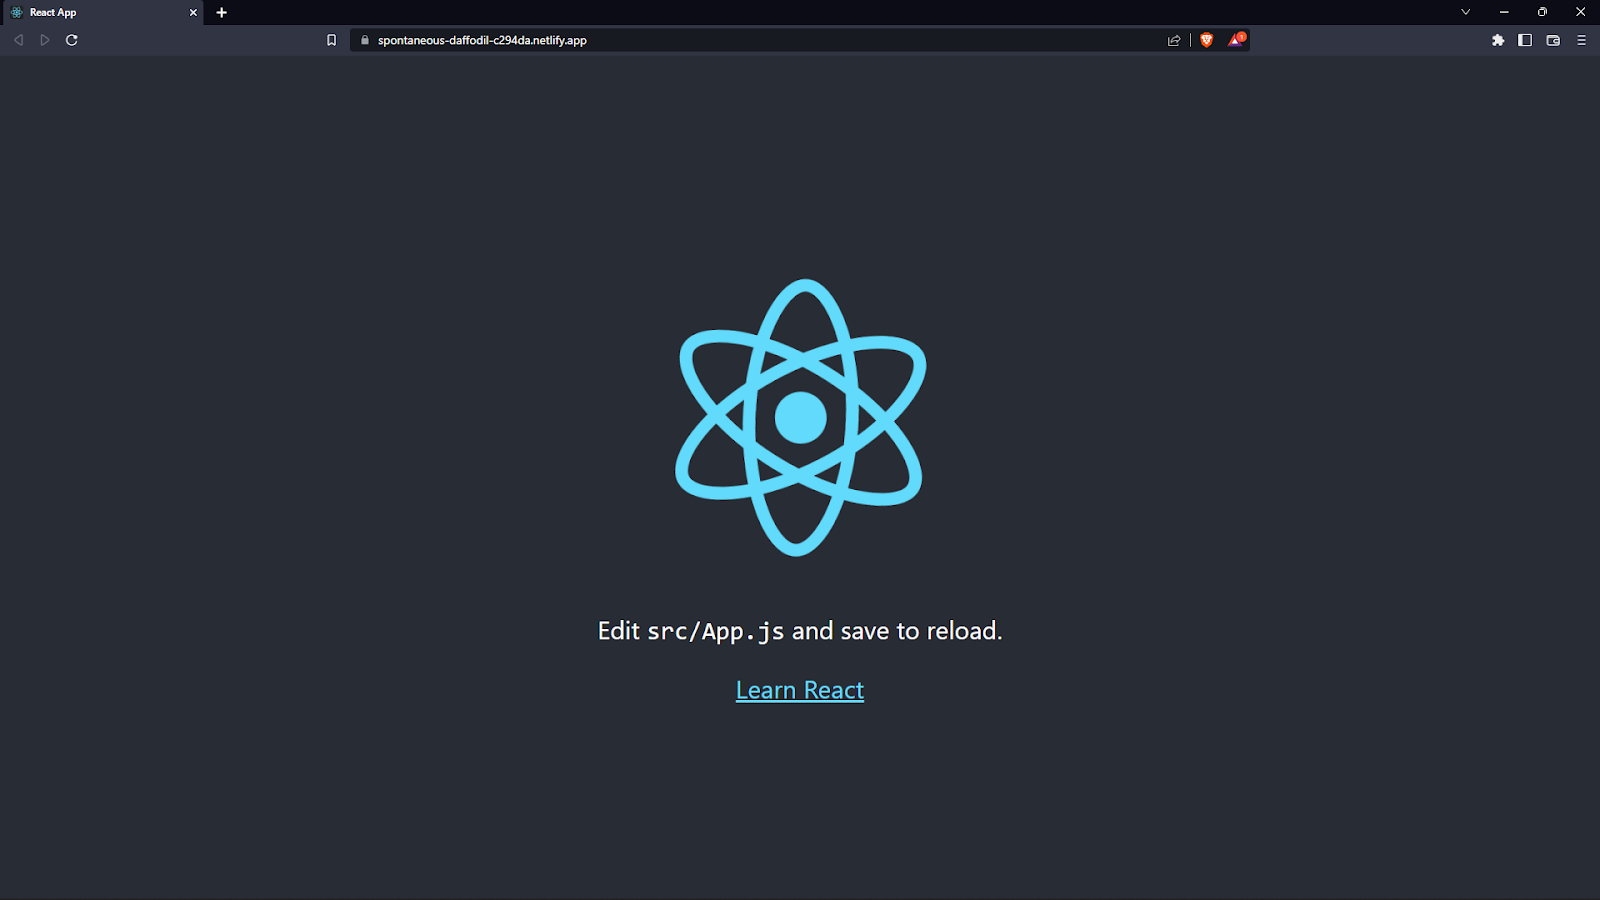
Look at how quick it is to set up your react app!
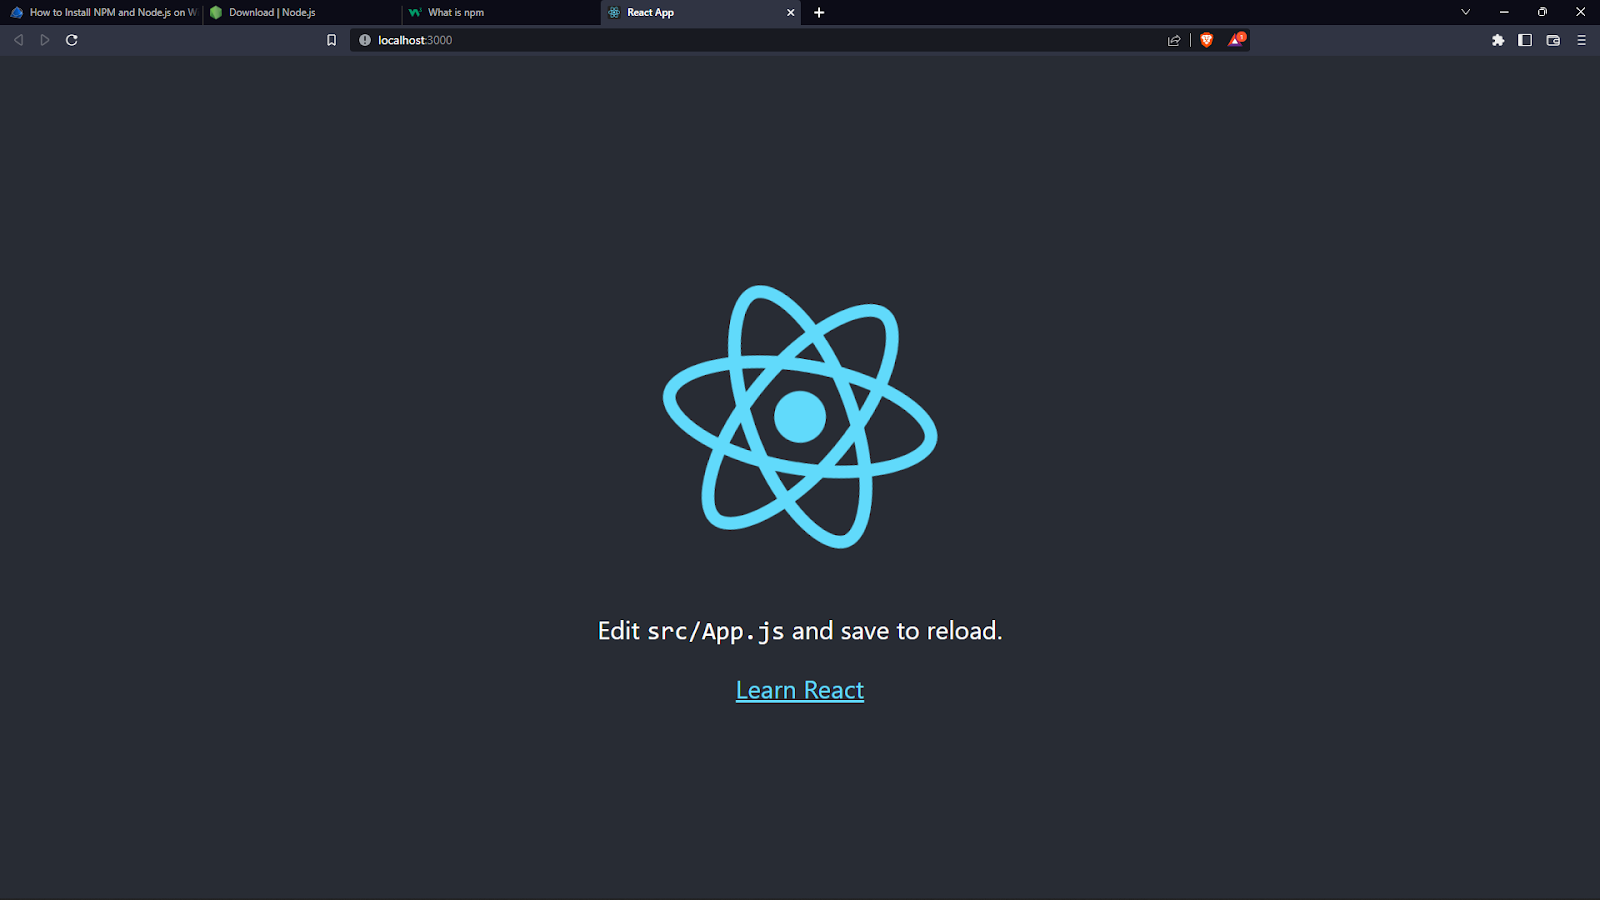
This is the default React template and you can make changes however you want in your components in your project.
What is HMR?
In the past, whenever you would need to make a change to your code, no matter how small, you would need to rebuild the entire app and refresh the page.
Rebuilding the entire app for one small change is inefficient and slow. Refreshing the browser is not so bad, but you will lose all the values in your variables (otherwise known as state) every time you do that.
Sometimes this is desirable, but it would be better if only the presentation parts changed when it comes to altering or iterating your app (especially the style).
So Enter Hot Module Replacement!
HMR intelligently rebuilds and reloads only the parts of your app that actually changed. It’s fast, and you keep your application state if you want.
HMR saves time you would otherwise spend waiting around or inputting data to recreate your application state. More than that, it reduces friction, allowing you to stay focused on your task and be more productive
Test React HMR
Let’s take React’s built-in HMR for a spin.
Open src/App.js in your editor
Open local host (ideally on the other side of your screen to observe the effect)
Change the “Learn React” from line 18 character by character to “My app” and see how the live effect is enabled.
If you opened your windows side by side, you should observe the following:
In my case, I can see the text deleted and updated on the browser as I change them in my code editor.
Usually, the page would reload, and the text would be updated as a whole after the change is made, but HMR worked its magic behind the scenes to only change the part of the page that actually changed in the code.
Deploying your app to production
React makes it approachable to deploy your website to Vercel, GitHub pages, or Netlify.
So approachable, I am encouraging you to follow along as we deploy the generated application to Netlify. When you make changes, updating the live website will be much easier then.
What do I need to know? To follow along, you will need: A GitHub account, Git installed locally, and fundamental knowledge of Git.
Start with Git
Continuous deployment is a widespread and encouraged technique today. Simply put, when you update your live website, services like Netlify notice and download your updates when you post your code to the main branch on GitHub. This can be accommodated with React.
That might sound a little strange, but I urge you to give it a shot. As soon as you see everything in motion, it will be a lot simpler to comprehend.
Before anything, create a GitHub repository and note the URL.
Next, run the following commands (ensure you replace with your repository URL!):
git init
Import project with Netlify
Nice! The code React developed has been posted to a GitHub repository that you created.
We will then inform Netlify about the GitHub repository.
If you have not already created an account, this is a good time to make a free Netlify account.
Once you have logged in, click “Add New Site”, then “Import Existing Project”.
You will see the following page:
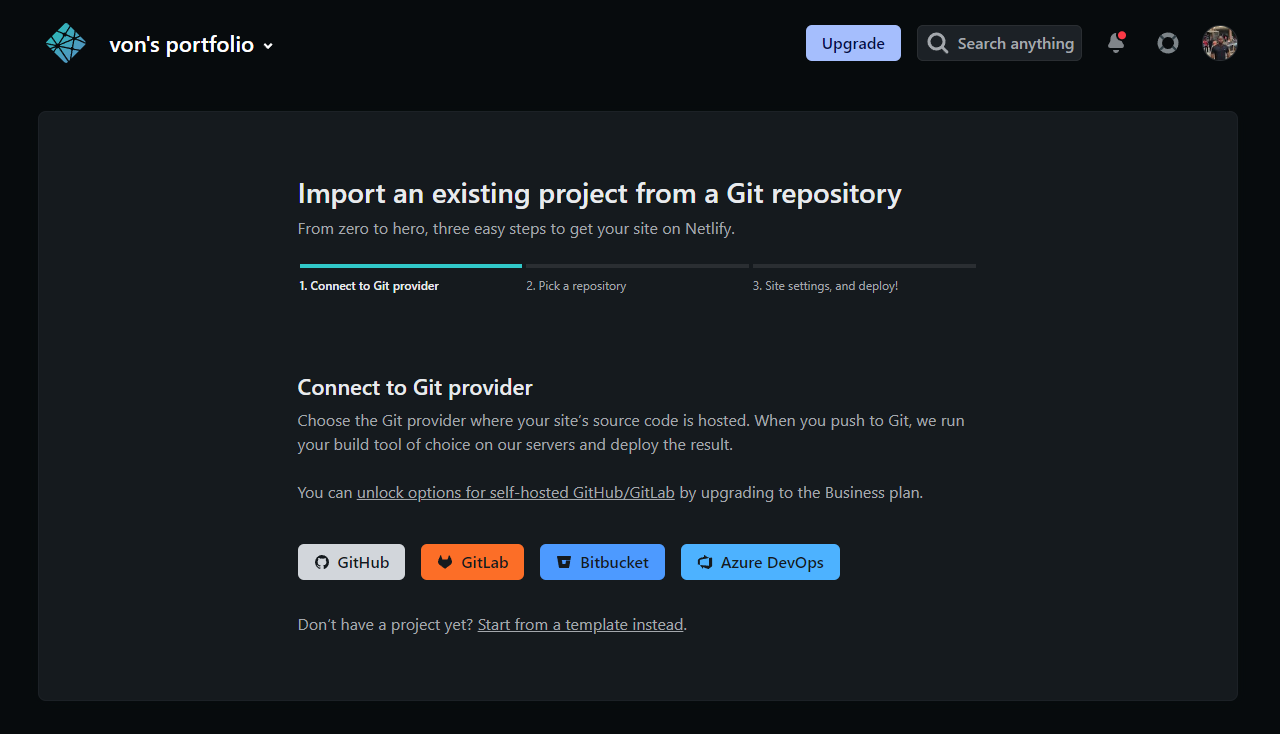
Click GitHub.
You will be prompted by GitHub to confirm whether or not to grant Netlify access to view and download your repositories. You may proceed!
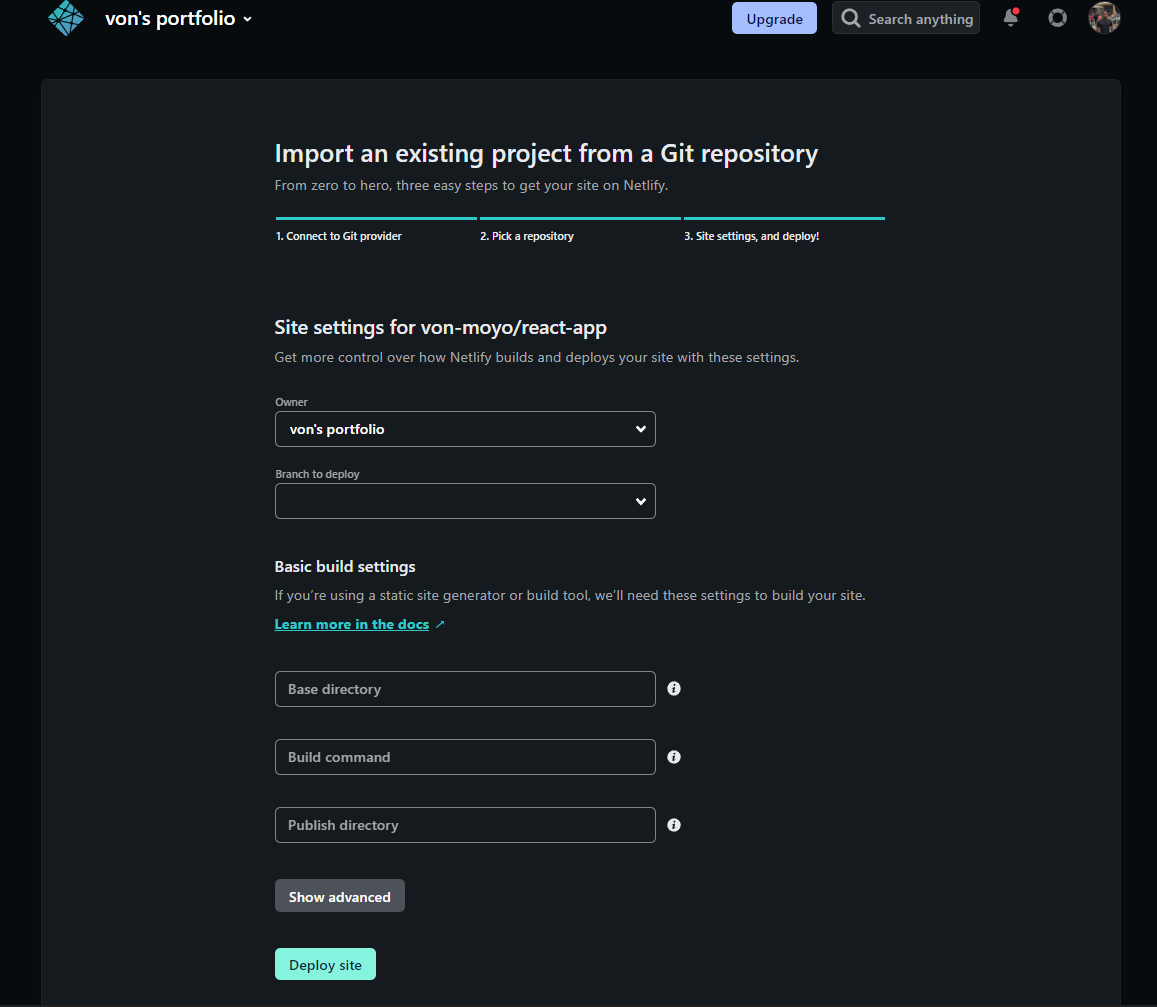
Once Netlify has permission to interact with your GitHub account, it will load and list all your repositories. Pick the repository you just created. Mine is called react-app.
Deploy your app
Once you select your repository, you’ll be prompted to set some settings.
React knows what Netlify wants to see and it makes your life easy by adhering to the defaults. That means you don’t have to change anything here. Just hit Deploy site:
Once deployed, you should see this page and the link to your website:
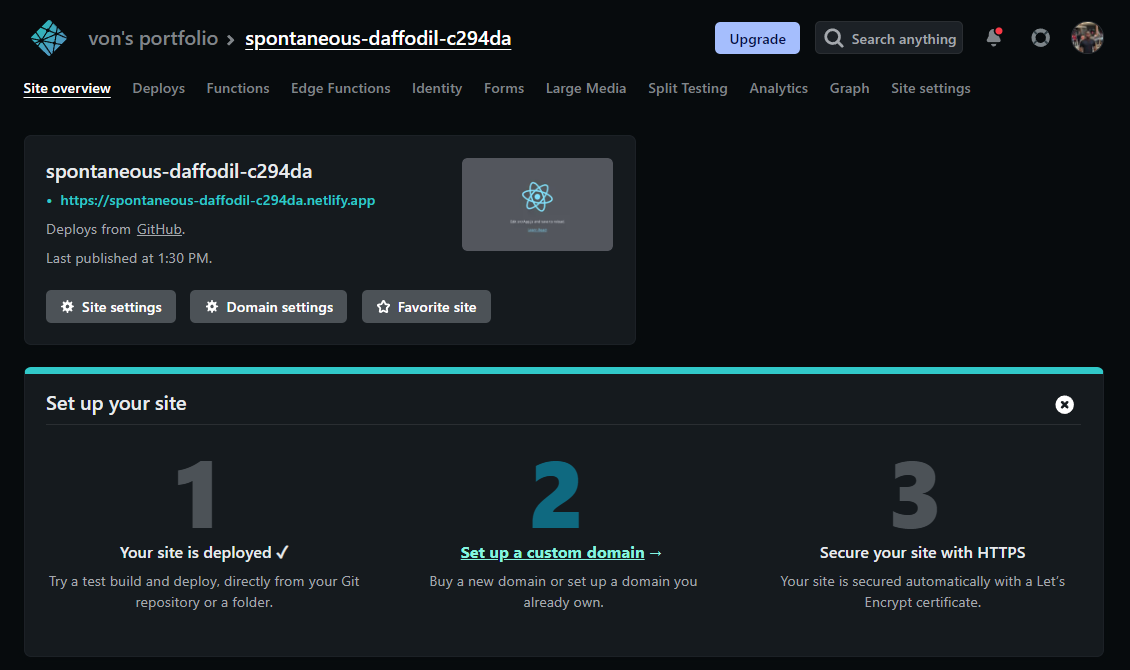
In our case, the link is React-link
Explore the Site Settings when you next have some free time.
You may modify anything about your website from here, including choosing a unique domain name!